
 by
by 
Running an outdoor store isn’t for the faint of heart.
You have seasonal inventory swings, bulky, expensive inventory, and products and gear that require customer education to sell. The good news? You can minimize the stress of all these challenges (and boost your sales) with the right visual merchandising.
Visual merchandising in outdoor retail is about more than creating attractive endcaps. You need to lay out your store and design your displays in a way that helps customers understand performance features and make informed decisions about their gear.
And when you get your visual merchandising right, you build confidence in your customers and help them make the journey from “browsing” to “buying”.
This post outlines eight practical visual merchandising strategies tailored to the unique challenges of outdoor retail. We’ll talk about each strategy, why it works, and give you the tips you need to implement it.
Visual Merchandising for Outdoor Stores: Beyond Traditional Retail Display
Visual merchandising is the practice of arranging your products, displays, and overall store layout to maximize sales. It’s a critical strategy for retailers across industries, but outdoor stores have a few unique challenges and opportunities.
First and foremost: extreme seasonality. While other retailers have holiday merchandise and seasonal trends, you overhaul your entire store multiple times each year, switching from skiing equipment to camping gear to hunting supplies. This means you need multiple visual merchandising strategies throughout the year, and access to the data to back those decisions up.
The next challenge you face is balancing security with accessibility. You have mountain bikes worth several thousand dollars — but unlike a jewelry store that can lock its most expensive pieces behind glass, your customers need to touch and handle these high-value items before they feel comfortable making a purchase.
You also need to plan room for fitting hiking boots and helmets into your floor plan, so customers can explore these items without feeling crowded.
Related Read: 9 Outdoor Store Inventory Management Tips
Finally, consider customer education. Winter gear, tents, bikes, and skis all have technical specifications your customers need to understand if they’re going to make the right decision. Think about how you’ll display these specs and features when planning your visual merchandising strategy.
With these complications and considerations in mind, let’s explore the visual merchandising tips that work best for outdoor retailers like you.

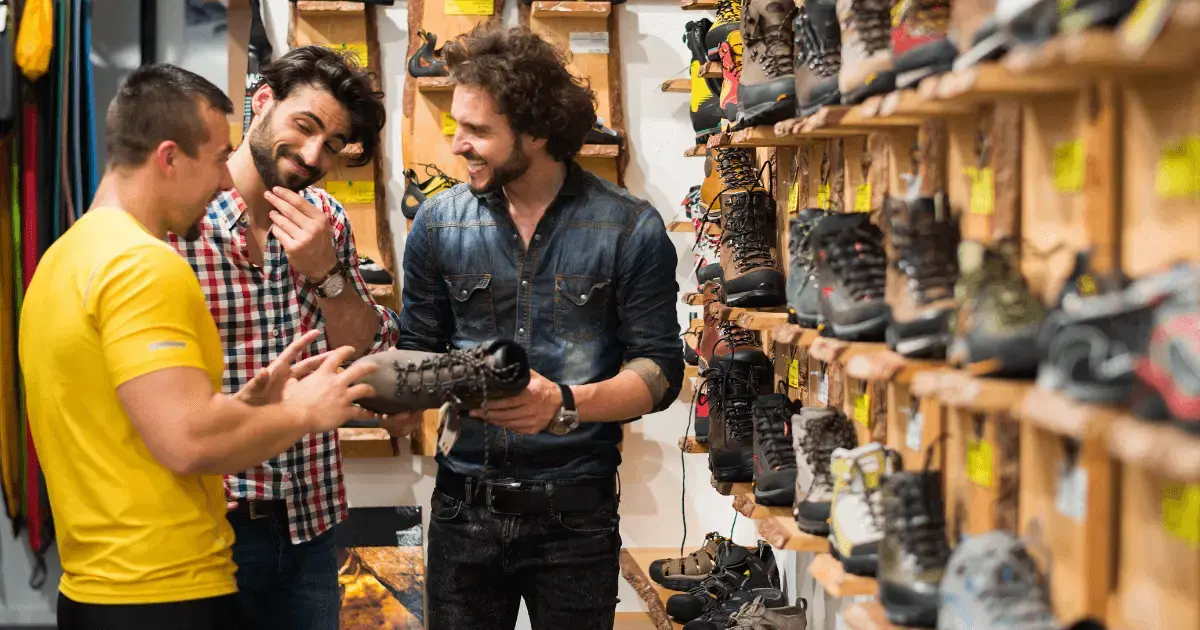
1. Create Equipment Education Displays
Your customers need to understand what makes one backpack or tent better than another for their specific needs before they feel comfortable making a purchase. Your displays should be designed to include clear explanations of technical features.
Related Read: 6 Must-Have Marketing Strategies for Outdoor Stores
Start with the basics: Include comparison charts that compare and contrast the differences between your sleeping bag collections, or explain why one hiking boot offers a different ankle support than another.
But don’t just put some specs on a poster board and call it a day. Use real-world scenarios to help customers understand the functional differences between their options. Label displays with context, such as “Day Hiking Essentials” or “Technical Mountain Running Gear.”
Then, track your results. Each season, use your point of sale (POS) system to track your sales data and see which displays result in purchases and which ones fall flat. Over time, you can optimize your educational approach by taking the best performers and applying the lessons you’ve learned to the next season’s displays.
2. Design Flexible Displays for Seasonal Inventory
Your entire store layout needs to change dramatically from December to June. To get the most out of your displays (without spending a ton of time and resources every season), you want to invest in modular display systems.
Use adjustable shelving and movable fixtures to set up your seasonal displays, and invest in versatile signage that’s easy to switch out or reorganize each season.
The trick to capturing the most sales each season is to take advantage of the transitional times. Introduce customers to upcoming seasonal inventory in designated displays. Position these transitional displays near the entrance so customers preparing for their next seasonal adventure can see your store has everything they need.
Related Read: Outdoor Retailers: How To Manage Seasonal Inventory
Unsure when to switch out your displays? Use your point of sale data. Rain POS offers seasonal reporting features that show you exactly when demand shifts based on historical sales data, giving you the information you need to adjust your displays before the rush hits.
Chances are, you’ll have occasional customers coming in to snag an off-season item. Don’t waste floor space displaying these pieces. Instead, implement smart storage systems in your back room that make it easy for staff to locate out-of-season items when a customer requests them.
3. Balance Security With Hands-On Product Experience
You can’t sell high-end outdoor gear if customers can’t touch it first. But you don’t want to risk an expensive pair of hiking boots literally walking out your door, either. The solution is to design displays that secure high-value items without making them inaccessible to your customers.
One great option is to invest in tethering systems. These solutions help you secure items like bikes or skis on retractable cords that let customers see how the product feels and moves without compromising store security.
You can also create designated demo or try-on areas where customers can test and try on expensive equipment. Place a few staff members in this area, both to answer customer questions and to keep an eye on that expensive inventory.
The right security approach protects your investment without cutting out the hands-on experience that closes sales on premium gear.
Related Read: How To Start an Outdoor Store: 5 Simple Steps
4. Designate and Track Demo Equipment Separately From Retail Stock
Most outdoor stores need demo equipment. Customers want to feel the weight of a fully-loaded backpack or understand how a climbing harness fits before buying. These items should be clearly labeled and displayed as demo gear that customers can feel comfortable handling and exploring — without the fear of damaging your ready-for-purchase inventory.
These items are different from your sellable inventory and should be labeled differently in your POS system. You can use your POS and inventory management tool to monitor demo equipment condition, so you can retire worn demo gear or sell it at a discount with your outdoor gear trade-ins.
5. Build Dedicated Fitting Spaces Into Your Floor Plan
When dealing with outdoor gear, technical fit is about more than comfort — it’s about safety. A poorly-fitted climbing harness or ski boot can be dangerous. You need to accommodate your customers’ need to try on these key items before they make a purchase.
Related Read: Outdoor Gear Maintenance: Protect Your Store and Customers
Even items like hiking boots, helmets, and coats require fitting, which means your customers need space to try them on comfortably, too. When you build your visual merchandising plan for the season, design dedicated try-on areas with seating near footwear displays or full-length mirrors near items like waders or coats, so customers can check out how it fits.
Keep sizing tools and measurement guides accessible in these fitting areas. Make Brannock devices, foot measurement tools, helmet sizing guides, and size charts easily accessible for both customers and staff.
6. Use Color and Lighting To Highlight Features
Lighting matters in outdoor retail. Focused lighting draws attention to seasonal, high-margin, or featured products, which boosts sales. You can also use lighting to create visual contrast throughout your store. Use brighter, energetic lighting for active gear like bicycles and climbing gear, and warmer, comforting colors for camping equipment to set the right tone.
Be sure to provide adequate lighting throughout your entire store. Customers want to inspect details like stitching quality or fabric texture, and they need the right lighting to do so. Poor lighting makes it difficult to distinguish between similar products and causes hesitation, which can kill a sale.
You want to consider color when designing your store and displays, too. Outdoor activities are often associated with energetic colors, like vibrant blues, greens, and oranges. You can also use color-blocking in your store to help customers navigate your store more easily.
7. Group Products by Activity and Skill Level
Most customers come to your outdoor store looking for a specific type of gear. Make their job easier (and boost your sales) by creating distinct areas for different activities. Group your hiking gear together in one section, your camping gear nearby, and your skiing equipment in another area.
But don’t stop there.
Within each section, create zones for each skill level. A first-time backpacker or novice skier needs different gear than a seasoned pro in either activity. Create displays for beginner basics and sections featuring your advanced gear to make it easy for customers to find the equipment they need for their activity and skill level.
The advantage of this approach is that it lends itself well to cross-merchandising. Grouping items by activity type lets you display complementary items near one another, encouraging customers to buy more. Displaying tents near sleeping bags and hiking boots can turn a tent sale into a bundle deal.
An advanced POS system, like Rain POS, offers the reporting features and sales data you need to see which product groupings drive more sales and which ones are falling flat — this helps you improve your cross-merchandising strategy over time.
8. Create Seasonal Window Displays
Finally, you want to update your window displays each season. Track weather patterns closely and swap your hiking displays for ski gear as soon as the wind starts to bite. Keeping your window displays on-season is crucial for capturing impulse buys and foot traffic.
Have a little fun and make your window displays local. Include photos of local peaks, trail maps, or action shots of real customers (or staff!) using your gear.
You can also include helpful information like trail statuses, river levels, or snow depth in your window display. Updating this information daily makes your display genuinely helpful to customers, and reminds them that there’s fresh powder and they should snag new goggles to get out there.
Grow Your Outdoor Store With Better Visual Merchandising
Visual merchandising is about more than looking good. Using these eight tips and tricks, you can educate your customers, keep your products secure, and capture seasonal sales more easily than ever.
But setting up your first round of seasonal displays is only the beginning. If you want to get the most out of your visual merchandising strategies, you need the right data.
Rain POS gives you all the information you need to make the right merchandising decisions for your store. You can use sales reporting to track which displays perform best, plan seasonal transitions, and get the most out of your displays every season.
Ready to see how Rain POS supports better merchandising decisions for your outdoor store? Schedule a demo to discover how the right POS system helps you sell more gear and better serve your customers.

.webp?width=520&height=294&name=RAIN%2063026%20How%20To%20Personalize%20Marketing%20for%20Craft%20Store%20Customers%20(1).webp)
![How To Create a Boutique Customer Loyalty Program [+ Why You Should]](https://www.rainpos.com/hs-fs/hubfs/shutterstock_2498045751%20(1).webp?width=520&height=294&name=shutterstock_2498045751%20(1).webp)

